


HFMA Local and Microsoft Teams
We moved from emails ending in @hfma.org because the security is tied to our much more stringent security policy, and we can more easily offer chapters support on Teams. There are no more enforced external email warnings, not (as) strict policies to send financial information over the internet, and a general organizational benefit to the Chapters/Regions.
- Chat, meetings, file sharing, and apps
- Works on desktop, web, and mobile
- Keeps communication and files in one place
- Has Sharepoint, Teams, Surveys, and more!
Don’t worry! This doesn’t mean less security; just less burden to send and receive information.
Requesting and Transferring the Email
Most chapters have already received an @hfmalocal.org email. If you are not sure, check with your chapter president. Each chapter can request up to two emails and each region can request one. Chapters are also encouraged to use this @hfmalocal.org address for all emails coming from Cvent, so members and enterprise organizations can whitelist this email and it won’t change from year to year.
Does your chapter or region need an email? Request one here: https://cvent.me/L1aOvG
Each year, at least a week before June 1st, chapters whose account owner is leaving (i.e. the president is rotating out) and will no longer be the one in control of the inbox and teams, will need to ensure a smooth transfer of ownership and information.
Is your team transitioning who owns the account? Fill out this form to begin the process: https://cvent.me/L1aOvG
Accessing Teams and Outlook
Microsoft Teams and Outlook are both available to use via their web app (website) and desktop application versions.
For the web app, visit:
https://teams.microsoft.com/v2
Otherwise, open the app from your desktop. We will use Teams as an example (the sign-on process is the same across all Microsoft applications).
If you already have an active session with a Microsoft account, whether it is Personal, School, or Business, you may already see that organization’s Teams or Inbox. To access HFMA Local, we need to add your account.
If you are already logged in with another organization, click your profile in the top-right, and then click “Add Account.”
This quick guide will show you the basic steps of making a new channel and then creating a folder or uploading a file within.
Create a Channel
Right-click the team you want to create a new channel for in the Teams application and click Add Channel:
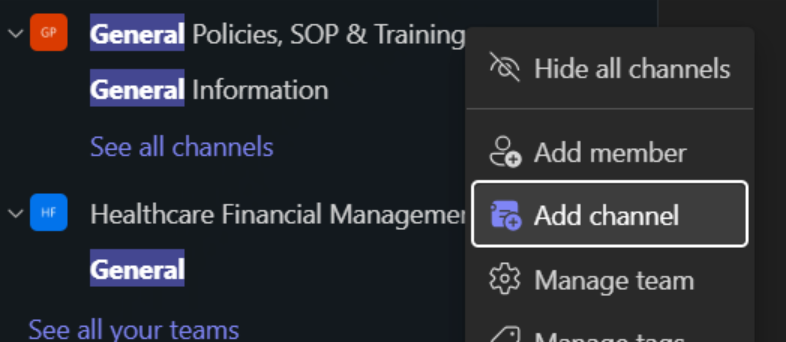
The dialog box will open with the info you need to fill in for the channel:
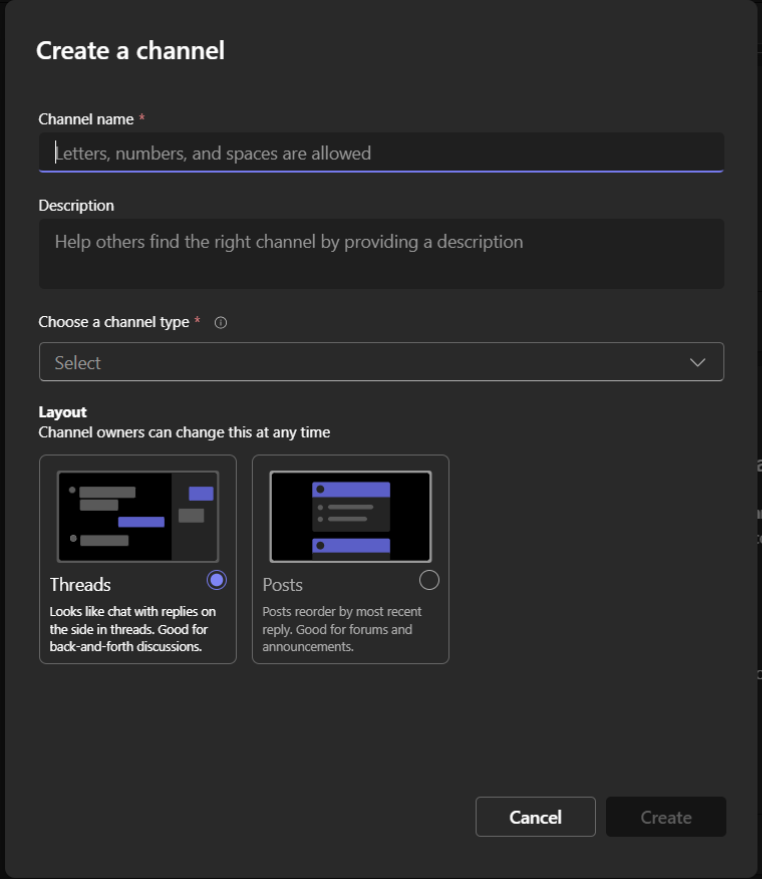
Give it a name that makes it clear what it is for, and a description if you wish.
Note that for channel type, we do NOT support “Shared” channels. You must select either Public or Private.
Note that once a channel has been made, you cannot switch its type later. If you wish to make a Public channel Private later, you must create a brand-new channel.
Lastly, you can choose your preferred layout for the posts, either Threads for a conversation view or Posts for an info-board style. This can be changed whenever. We will use a Posts type.
Click “Create.”
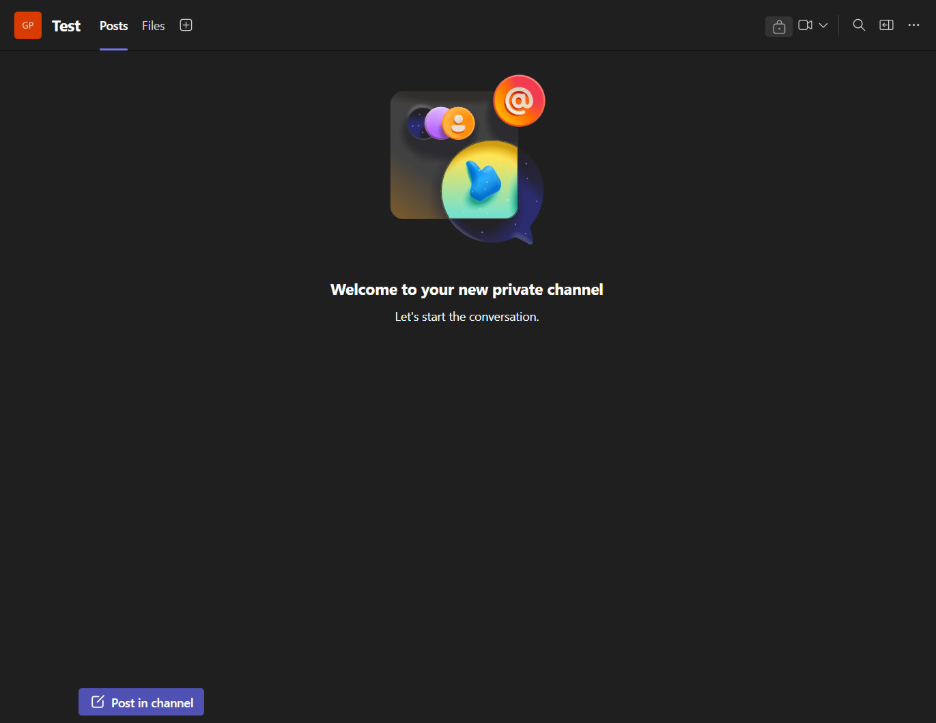
Our channel has been made! You will have two tabs for every channel, the first being either Conversation or Posts (depending on the Type you picked) and then “Files.”
Note: The Files tab is a connector to SharePoint. SharePoint powers the file system and data of every Team and channel in any teams application. Think of Teams as a UI wrapper for SharePoint. When you make a new Channel, it has it’s own root “Documents” folder. Take note of this if you wish to use the SharePoint website to manage your Chapter’s files and information in the future.
Create a Folder
In our new channel, we will now make a folder. Click the “Files” tab. You will see an empty page like so:
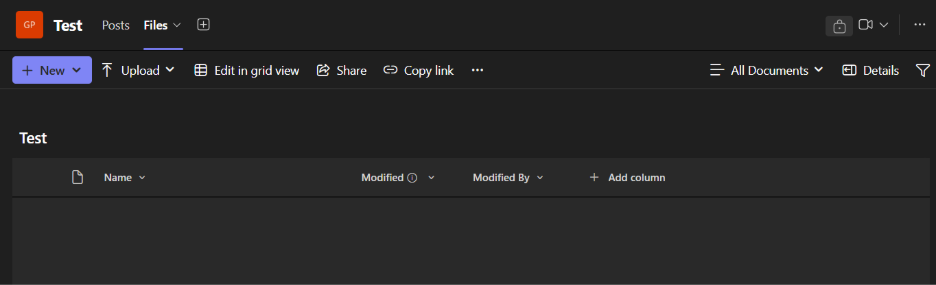
Familiarize yourself with the toolbar, these will be important to understand how to manage and make folders and files. We will click “New” and then Folder:
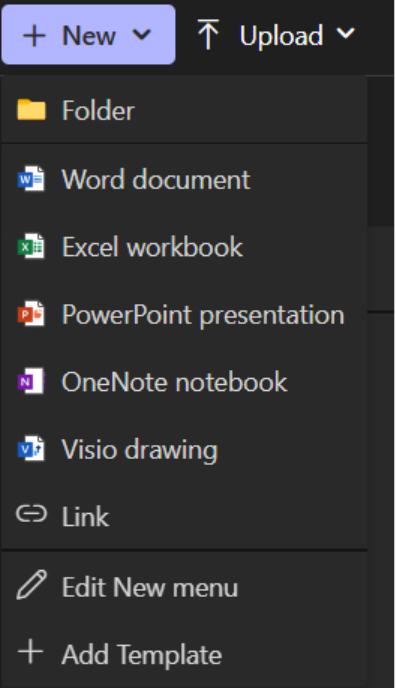
With your HFMA Local account, you have access to all of the core Microsoft 365 web apps, so you can also make a new Word, Excel, PowerPoint, OneNote, or Visio document here too!

Continue by giving your folder a name, and feel free to pick a color for it too.

Success! The folder was made in the channel and can now be clicked on for another layer of your Team’s own file system.
You can use the New or Upload button at anytime to upload folders or files directly into your Channel’s document library.
Managing Access to Folders/Files
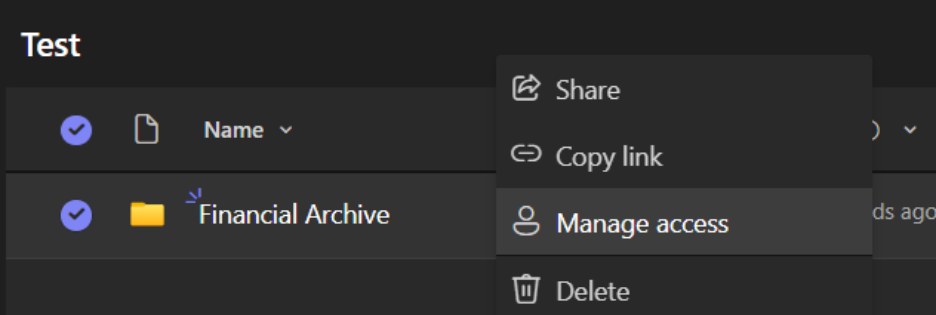
Right-click your newly made folder and click “Manage Access”:
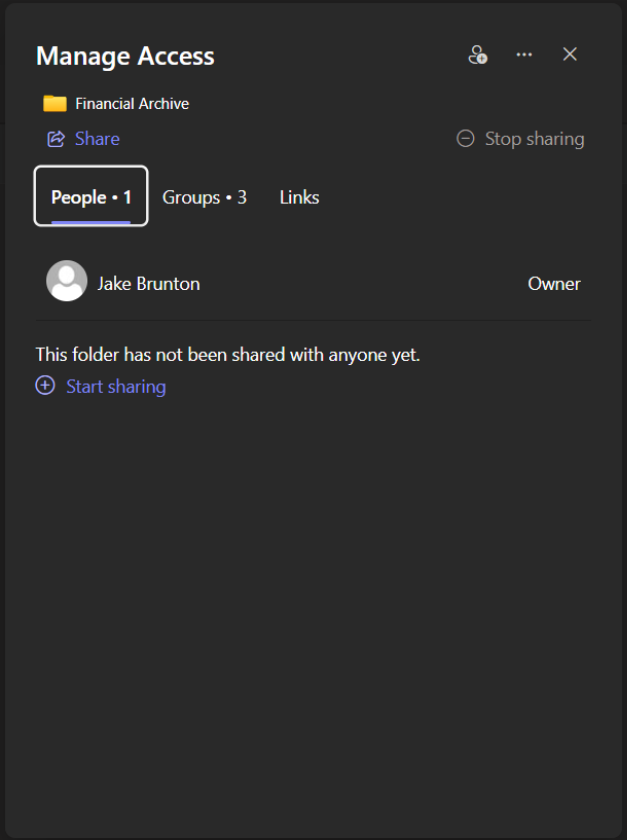
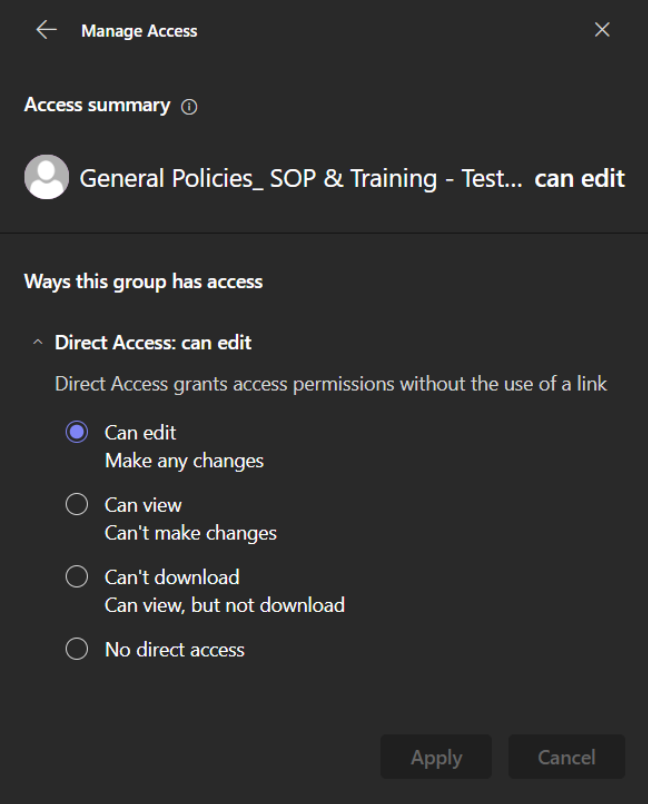
From here, you can control at the folder (or file) level which Team members can access the folder (or file) and what they can do. Groups will always, by default, give read and write permissions to the members in your group, and view rights to visitors:
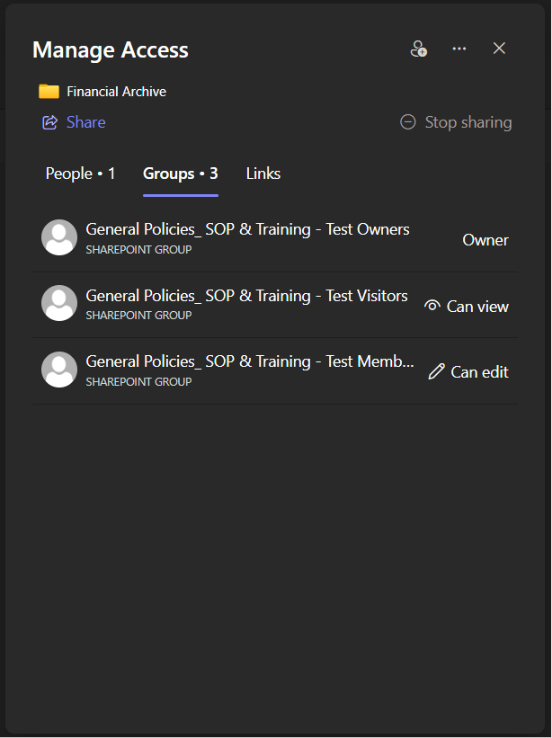
You may click on any of these groups to choose what users in that group can do if they have direct access:
Back on the main dialog box, clicking the person icon in the top right is a quick way to provide access to someone or to a group:
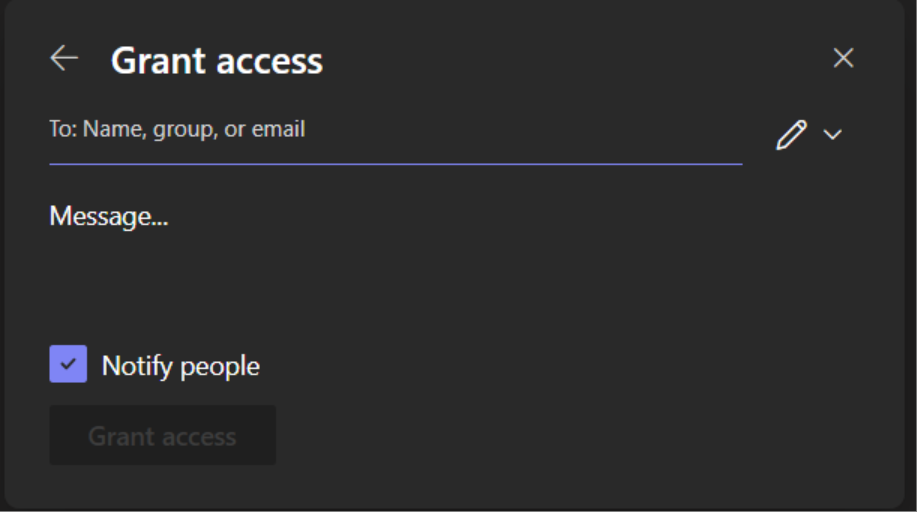
From here, you can write out names of other accounts, groups, or even emails. You can input external emails as well, which will invite guests to come and view the folder (or file). You can change the permissions by clicking the pencil icon (you can allow Edit rights, View and Download, or just View).
Manage the Channel
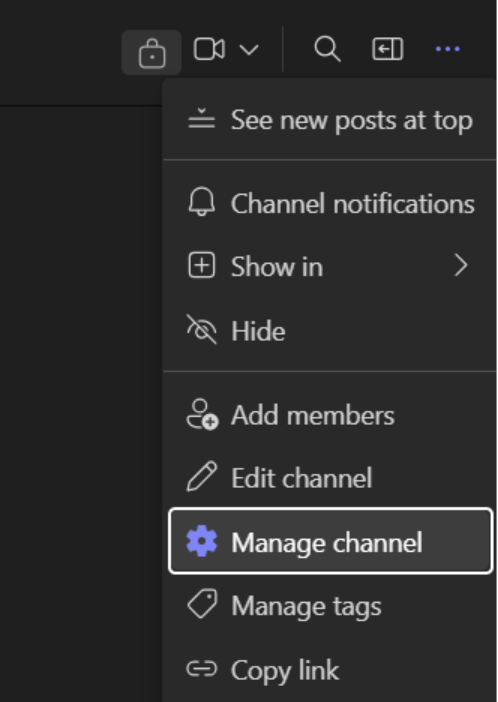
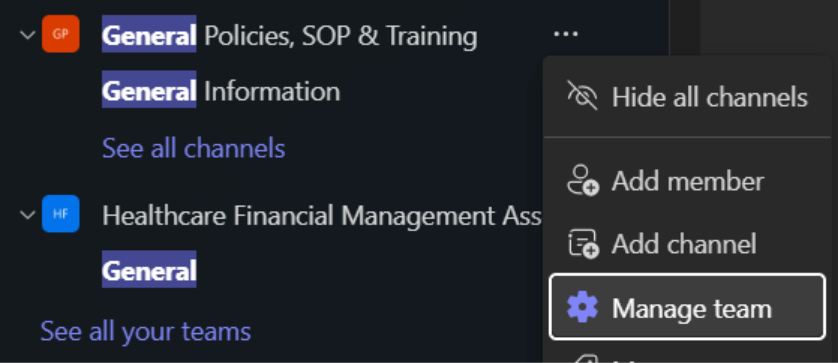
If you wish to make changes to the Channel at any time, click the three dots at the top-right and click Manage Channel:
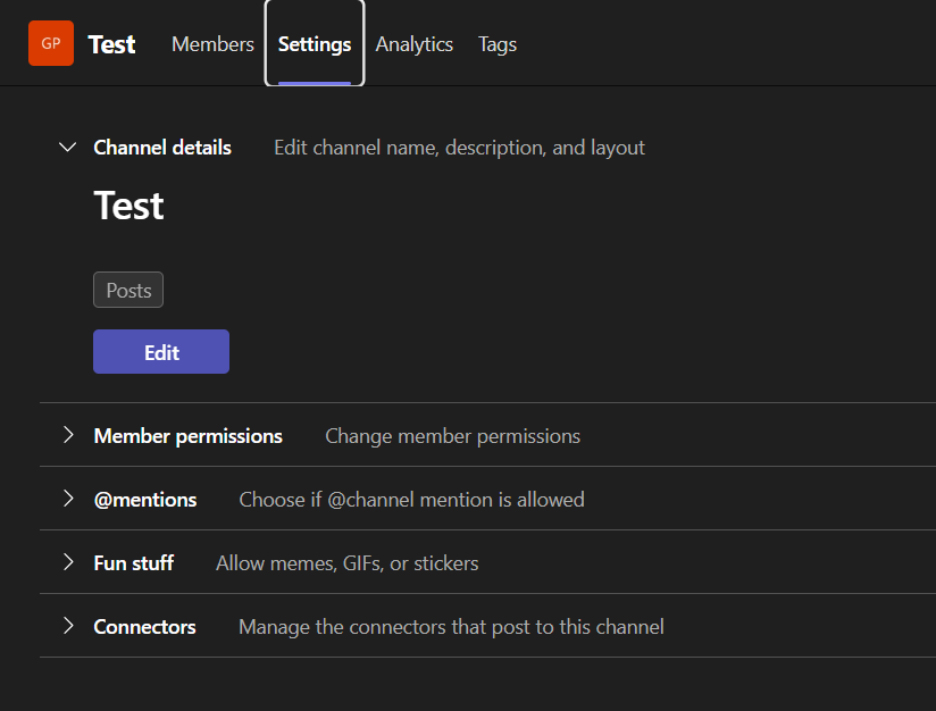
From here, you can see all the Members of the Channel (including external Guest accounts), settings, analytics, and any tags you make. Click “Settings” and take some time to review what options you have here.
This quick start guide will briefly show you how to navigate your Team’s settings.
Accessing Settings
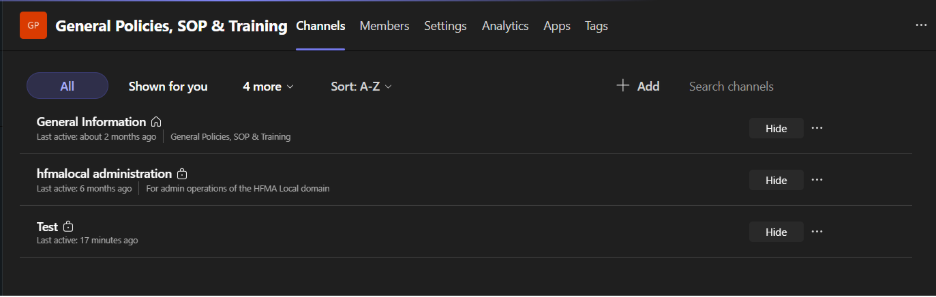
From the list of Teams, find your team, right click and select “Manage Team”
You will see a page with all of the relevant tabs, starting with an overview of all of your Channels:
Members Page
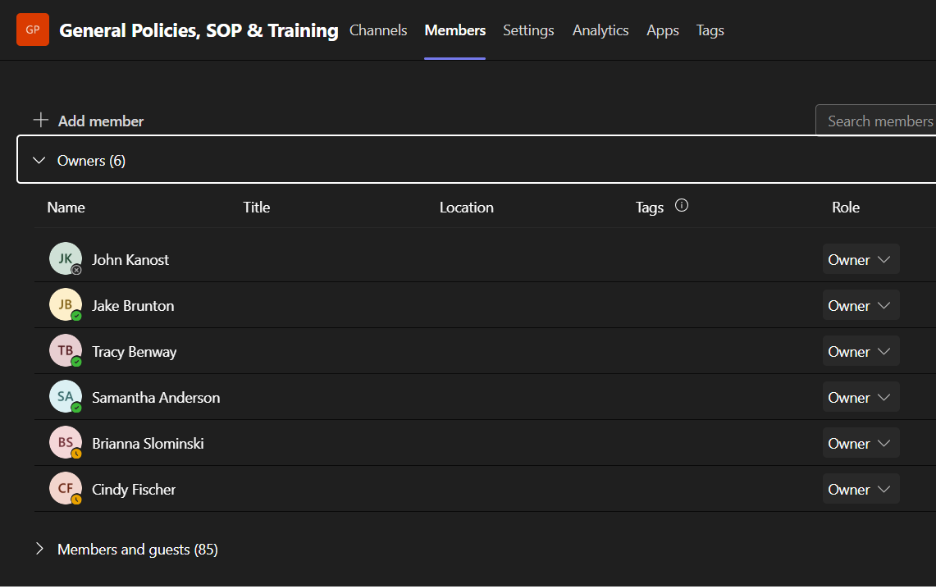
From here, you can review all Owners, Members, and Guest accounts part of the Team and quickly change their role as needed.
Settings
The overview will let you quickly change your Team Name and Picture.
Member Permissions
Let’s you turn on/off permissions for your Team Members (this means Members, not your Owners or Guests)
Note that you can control similar permissions at the Channel level as well, so consider this as you build your Team.
Guest permissions
Let’s you turn on/off permissions for your Team’s Guest accounts.
Mentions
Control if members can use @mentions and the behavior of it.
Others
Team Code will not be applicable in the scope of HFMA Local. Feel free to review Fun stuff as you wish.
Inviting Guests
You will likely need to bring in many guest users to your HFMA Local team. A quick way to do this is right-clicking your Team name in the sidebar again, and click “Add Member”:
Input the end-user’s contact email, and click “Add xy as a guest?”
Finally, click “Add.”
The end-user will receive a Microsoft email that they have been invited to a Team in the HFMAUSA (HFMA Local) tenant. They must follow the steps in the email to finish their Guest account set up.
Note per the information security policy you are responsible for managing your guest users and what they will have access to.
For a comprehensive guide, Microsoft has existing materials for ALL of their products. View more about managing a Team: Manage team settings and permissions in Microsoft Teams – Microsoft Support
Directions are in a PDF here: Setting Up Microsoft Authenticator
Directions for setting it up on your phone: Setting up MFA On Your Phone
Admitting from Lobby
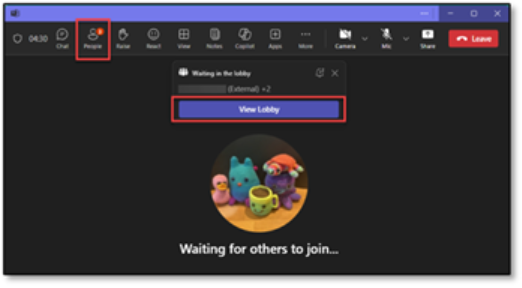
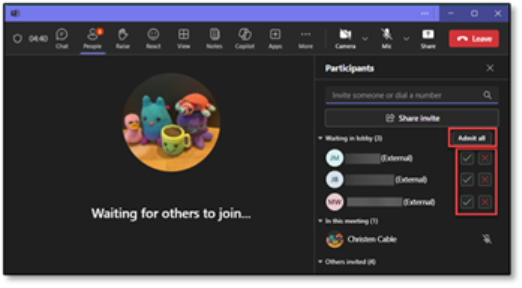
Step 1: When people first join your lobby, a pop up will appear with a button to view the lobby. Alternatively, you can select the people button on the ribbon which will have a red dot letting you know there are people in the lobby.
Step 2: In the participant pane, you can see who is waiting in the lobby, admit or reject individual participants, or admit all participants in the lobby.
Disabling Lobby

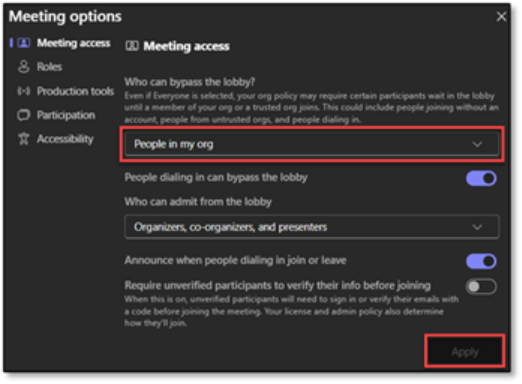
Step 1: Select the three dots on the ribbon, then settings, then meeting options
Step 2: Here you can adjust who can bypass the lobby. Settings include Only organizer and co-organizers, People in my org, People in my org and guests, People in my org, trusted orgs, and guests, and Everyone.
These settings can be adjusted at any time. Make sure you click apply after making any changes.
Assigning Co-organizer

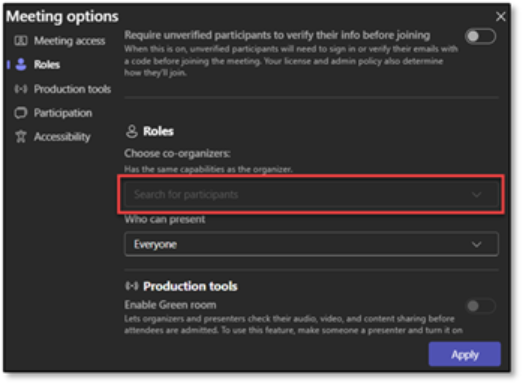
Step 1: Select the three dots on the ribbon, then settings, then meeting options
Step 2: Under roles you can select an invited participant to act as co-organizer. They would get the same privileges you have to make edits in the meeting. Please note that they must be an invited participant, not someone who joined via a shared link.
These settings can be adjusted at any time. Make sure you click apply after making any changes.
Presenting Permissions
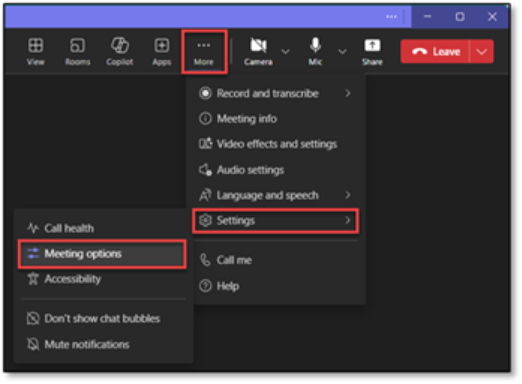

Step 1: Select the three dots on the ribbon, then settings, then meeting options
Step 2: Under roles you can adjust who can present during a meeting. Options include Everyone, People in my org and guests, Specific people, or Only organizers and co-organizers.
These settings can be adjusted at any time. Make sure you click apply after making any changes.
This PDF demonstrates how to switch between accounts.
Microsoft Teams Quick Start Links
For a in-depth guide on the in’s and out’s of managing your team, please this this article: Manage team settings and permissions in Microsoft Teams – Microsoft Support
Learn how to Add Guests to a Team: Add guests to a team in Microsoft Teams – Microsoft Support
Outlook (Email) Quick Start
- Sign-in issues: I can’t sign in to my Microsoft account – Microsoft Support
- Difference in Accounts: What’s the difference between a Microsoft account and a work or school account? – Microsoft Support
- Password Reset: Change your Microsoft account password – Microsoft Support
For assistance or inquiries, email the Volunteer Experience Team.